Saturday 30 April 2011

Setup a yum or up2date repository to use a locally mounted DVD with Red Hat Enterprise Linux 4, 5 and 6

For Red Hat Enterprise Linux 4
In /etc/sysconfig/rhn/sources, comment out the following line:

 # up2date default

This line needs to be commented out otherwise up2date will keep on looking for information using the Red Hat Network first.

Next, in the same file, create a line like the following:

 dir mydvdrepo /media/cdrom/RedHat/RPMS

Note: The CD/DVD must be mounted and available in the directory /media/cdrom/ and the path must point to the directory containing the RPMS.


For Red Hat Enterprise Linux 5
First please update the yum tool's version to yum-3.2.8-9 or higher. As there is a bug in RHEL5.1.
The url error has been fixed in yum version 3.1 and above according to:https://bugzilla.redhat.com/show_bug.cgi?id=212180


Second create a dvd.repo text file in /etc/yum.repos.d/ with the following content:

[dvd]
mediaid=1170972069.396645*
name=DVD for RHEL5
baseurl=file:///media/RHEL_5%20i386%20DVD/Server 
(For example for RHEL 5.5 version baseurl line should look like
'baseurl=file:///media/RHEL_5.5%20i386%20DVD/Serverenabled=1')
gpgcheck=0

(*) The mediaid= value comes from the .discinfo file located in the root of the DVD.

For example, to install the dovecot package using the new dvd.repo file, run yum with the --noplugins option so yum will not try to communicate with the Red Hat Network servers to fetch the package and its dependencies:

# yum install dovecot --noplugins
Setting up Install Process
Parsing package install arguments
Resolving Dependencies
--> Running transaction check
---> Package dovecot.i386 0:1.0-1.2.rc15.el5 set to be updated
--> Finished Dependency Resolution

Dependencies Resolved

=============================================================================
 Package                 Arch       Version          Repository        Size 
=============================================================================
Installing:
 dovecot                 i386       1.0-1.2.rc15.el5  dvd              1.5 M

Transaction Summary
=============================================================================
Install      1 Package(s)         
Update       0 Package(s)         
Remove       0 Package(s)         

Total download size: 1.5 M

Is this ok [y/N]:

If problems occur while trying this procedure, run yum clean all and try running yum install again.

Note: This will only work for the "base" rpm pakages under the /Server directory; if access is needed to the rest of the software in the Red Hat Enterprise Linux Server DVD (Cluster, ClusterStorage and VT), add the following stanzas to the dvd.repo file:

[dvd-cluster]
mediaid=1170972069.396645
name=DVD for RHEL5 - Cluster
baseurl=file:///media/RHEL_5%20i386%20DVD/Cluster
enabled=1
gpgcheck=0

[dvd-cluster-storage]
mediaid=1170972069.396645
name=DVD for RHEL5 - ClusterStorage
baseurl=file:///media/RHEL_5%20i386%20DVD/ClusterStorage
enabled=1
gpgcheck=0

[dvd-vt]
mediaid=1170972069.396645
name=DVD for RHEL5 - VT
baseurl=file:///media/RHEL_5%20i386%20DVD/VT
enabled=1
gpgcheck=0

For more information, see man yum and the following related article:


For Red Hat Enterprise Linux 6

Mount RHEL 6 ISO to /media/rhel6

# mount -o loop RHEL6.0-20101111.0-Server-x86_64-DVD.iso /media/rhel6 

Copy media.repo file from the RHEL 6 ISO to /etc/yum.repos.d/

# cp /media/media.repo /etc/yum.repos.d/rhel6.repo 

Configure the repo file to point to the /media/rhel6

# vi /etc/yum.repos.d/rhel6.repo 

add following line

baseurl=file:///media/rhel6/Server

If you want to configure repository for HighAvailability , LoadBalancer , ResilientStorage ,  ScalableFileSystem then you can add following lines in rhel6.repo file

[dvd-HighAvailability]
mediaid=1289489697.332694
name=DVD for RHEL6 - HighAvailability
baseurl=file:///media/rhel6/HighAvailability
enabled=1
gpgcheck=0

[dvd-LoadBalancer]
mediaid=1289489697.332694
name=DVD for RHEL6 - LoadBalancer
baseurl=file:///media/rhel6/LoadBalancer
enabled=1
gpgcheck=0

[dvd-ResilientStorage]
mediaid=1289489697.332694
name=DVD for RHEL6 - ResilientStorage
baseurl=file:///media/rhel6/ResilientStorage
enabled=1
gpgcheck=0

[dvd-ScalableFileSystem]
mediaid=1289489697.332694
name=DVD for RHEL6 - ScalableFileSystem
baseurl=file:///media/rhel6/ScalableFileSystem
enabled=1
gpgcheck=0

Wednesday 27 April 2011

Enable FCP on NetApp FAS


FAS3140> fcadmin config -d 0b
Wed Jun 9 13:46:51 CST [fci.adapter.offlining:info]: Offlining Fibre Channel adapter 0b.
FAS3140> Wed Jun 9 13:46:51 CST [fci.adapter.offline:info]: Fibre Channel adapter 0b is now offline.
FAS3140> fcadmin config -t target 0b
Wed Jun 9 13:47:06 CST [fci.config.state:info]: Fibre channel initiator adapter 0b is in the PENDING (target) state.
A reboot is required for the new adapter configuration to take effect.
reboot….
fcp start
fcadmin config -e ob
fcp config
fcp show initiator
igroup create -f -t {os_type} {igroup_name}

Tuesday 26 April 2011

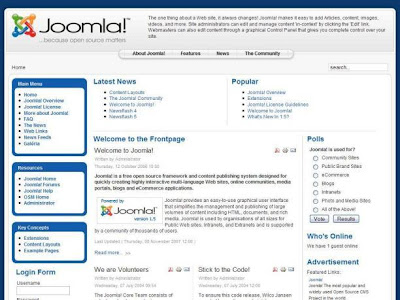
Apakah itu Joomla! Mari kita mengenalinya..


Apa itu Joomla? kepada yang sudah familiar dengan benda alah ni,boleh abaikan entry ni .Kepada yang masih tak tau apa itu joomla! boleh teruskan membaca sekiranya korang berminat untuk menghasilkan website sendiri dengan mudah tanpa perlu mengeluarkan sebarang modal. Ya ia FREE..Joomla! dilesenkan dibawah Lesen Dokumentasi Bebas GNU(free). Ciri2 yang menarik Joomla! ini ialah laman cache untuk meningkatkan prestasi, RSS, laman boleh cetak, berita terkini, blog, undian, carian laman, dan bahasa-bahasa,forum perbincangan dan banyak lagi.

Nama joomla! diambil daripada perkataan 'Swahili' iaitu jumla yang bermaksud 'mari bersama-sama' atau 'secara keseluruhannya'.Keluaran pertama joomla! ialah Joomla 1.0.0 telah diumumkan pada 16 September 2005.Sehingga kini,Joomla!telah keluarkan version terbaru mereka itu Joomla! 1.6 untuk menggantikan Joomla! 1.0.0 .Dianggarkan sehingga hari ini,ramai webmaster memilih Joomla! sebagai platform untuk membina laman web sama ada web personal,e-commerse atau sebagainya.Pasukan pembangunan asas menyatakan bahawa Joomla! 1.5 adalah kod yang ditulis semula dengan menggunakan bahasa pengaturcaraan PHP 5.

Joomla! bermula apabila terjadinya pembangunan perisian daripada versi Mambo diantara Miro Corporation dari Australia, pemegang hak cipta Mambo pada masa itu, dan kesemua ahli pemaju pusat. Kedua-dua kumpulan itu telah berpisah pada 17 Ogos 2005.

Itu adalah serba sedikit ringkasan mengenai joomla! dan sejarahnya. Ramai webmaster telah menggunakan Joomla! sebagai platform untuk membina laman web kerana lebih mudah dan user friendly berbanding menggunakan Dreamweaver atau sebagainya.Joomla! baru saja beberapa hari mengeluarkan version terbaru mereka iaitu Joomla! 1.6 .Korang boleh download di laman web joomla.org


Sekiranya korang berminat nak ada domain dan website sendiri tanpa perlu mengeluarkan sebarang wang untuk mengupah webmaster,aku cadangkan korang bina website sendiri menggunakan joomla!korang boleh rujuk di laman web http://www.joomla-my.org sekiranya menghadapi masalah atau baru pertama kali ingin membina website menggunakan joomla ni.Dekat sana ada forum perbicangan khas untuk ahli2 yang baru nak berjinak2 dengan joomla! ni. Selamat maju jaya!!!

Sunday 17 April 2011

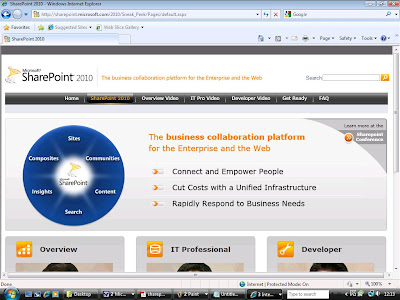
Microsoft SharePoint 2010


SharePoint 2010 is the business collaboration platform that enables you to connect and empower people through formal and informal business communities, within the enterprise and beyond, and to manage content effectively throughout the information lifecycle.The consolidation of collaboration solutions onto SharePoint 2010 makes it possible to cut costs through lower training costs, increased IT productivity and cost-effective maintenance, all within a governable and compliant platform.

Whether deployed on-premise or as hosted services, these integrated capabilities are enhanced by Search technologies and make it possible to rapidly respond to business needs based on data-driven business insight and faster solutions development and deployment.
Connect and Empower People
Making people more productive is a direct result of enabling them to access resources and knowledge regardless of where they are and what device they have accessible, while providing them with the best user experience for increased usability and adoption.

Faster adoption with the new user interface
In order to allow people to interact with SharePoint’s rich set of integrated capabilities in an easy and intuitive way, the Office Ribbon UI has been implemented in SharePoint, providing users with a familiar and contextual experience that drives their productivity even further. This user experience is enhanced by additional technologies that boost usability and by the ability of all users to easily edit and publish SharePoint sites.

Improved collaboration with Office 2010
Microsoft Office is, by far, the most commonly used business-productivity software in the world. Office has always been about automating tasks and providing people with choices in how they get things done. Office 2010 and SharePoint 2010 are designed to provide users with a set of capabilities that span across Client and Server, often without the users even realizing that both are involved.

Continued productivity regardless of location
Mobile work isn’t just for the sales force anymore. Today, most businesses support telecommuting and they expect employees to be “always on, always connected,” even when they are away from the office. SharePoint 2010 offers a diverse set of capabilities that extends people’s access to resources and allows them to be productive regardless of the tools or devices they have available.

Cut Costs with a Unified Infrastructure
Driving cost efficiencies and accomplishing more with the same resources is made possible through the consolidation of business productivity solutions onto SharePoint 2010. The ability to deploy any of the integrated capabilities and the new enterprise-class management tools to Intranet, Extranet and Internet sites, and the choice of both on-premise installation and hosted services, paves the way to optimizing IT resources and significantly lowering the TCO of business-productivity solutions.

Reduced costs through platform consolidation
The rich set of integrated capabilities for business collaboration provided by SharePoint 2010, in addition to its enterprise-scale manageability, will enable more and more customers to retire niche solutions and focus their solutions on SharePoint. This will accelerate their ability to drive efficiencies, allowing IT departments to achieve more impact with the same resources.


More choice with on-premises and hosted options
Nowadays, IT is required to support scale agility, allowing its business-collaboration platform to be scaled-up and scaled-out quickly, based on changing business needs. SharePoint 2010 provides IT with the flexibility of choosing whether to deploy on-premise or in the cloud, thus enhancing its ability to support any given scenario while optimizing resources and remaining relevant and efficient.

Proactive platform management
With business collaboration and productivity becoming instrumental to business success, IT departments are required to do more with no additional resources. With SharePoint 2010, robust management tools enable IT to multiply its impact and achieve a higher degree of effectiveness with the same resources.

Rapidly respond to Business Needs
In times when business volatility is on the rise and time-to-market is key, SharePoint 2010 enables all users (end users, power users, designers and professional developers), to customize the out-of-box platform and deploy solutions that will enable them to address specific business needs more quickly and more effectively.

More value with existing programming tools and knowledge
In-alignment with SharePoint’s approach of doing more with no additional resources, investments like the integration with Visual Studio 2010 will enable our customers to rely on existing pools of programming expertise to enrich the SharePoint platform and increase the quality and ROI on their investments.

Bi-directional interaction with line-of-business data
A major advancement in SharePoint is allowing users, regardless of their technical expertise, to interact with line-of-business data (LOB), surface it in their SharePoint sites, analyze it and make updates to be reflected in the external data source itself, such as ERP and CRM systems.

No-code customization for addressing business needs
Enabling users to address specific business and collaboration needs, while relieving It from the need to be involved in each and every change top the platform, is made possible through a rich set of tools and features that allow users to create no-code solutions and to deploy those solutions in an easy and secure manner.

For More Information Learn more about Microsoft SharePoint 2010 at: http://sharepoint2010.microsoft.com

Wednesday 13 April 2011

xWindows System Installation on Centos 5.x

To install xWindows..Run this command
#  yum groupinstall "X Window System" "GNOME Desktop Environment" -y

To start xWindows..Run this command
#  startx


After Centos 5.x / RHEL 5.x & 6.0 Installation


# system-config-securitylevel-tui

#  chkconfig netfs off
#  chkconfig nfslock off
#  chkconfig portmap off
#  chkconfig cups off
#  chkconfig hidd off
#  chkconfig bluetooth off
#  chkconfig kudzu off
#  chkconfig iptables off
#  chkconfig ip6tables off
#  chkconfig restorecond off
#  chkconfig rpcidmapd off
#  chkconfig rpcgssd off
#  chkconfig hidd off
#  chkconfig isdn off
#  chkconfig mcstrans off
#  chkconfig setroubleshoot off

IP Address Configuration
#  vi /etc/sysconfig/network-scripts/ifcfg-eth0

Default Gateway & Hostname Configuration

#  vi /etc/sysconfig/network

NETWORKING=yes
NETWORKING_IPV6=yes
HOSTNAME=ABIEMOK
GATEWAY=202.110.101.1

DNS Configuration

# vi /etc/resolv.conf

nameserver     202.110.101.88
nameserver     202.110.101.89  << add new DNS IP


Restart Network Services
#  /etc/init.d/network restart

Restart Server to complete the configuration
#  init 6


Setup Disks in FreeNAS

1. Select Disks and then Management from the top menu.


2. From the Management tab you can see all the disks that are currently configured and add a new one by click on the plus sign in the lower right corner

3. In the dropdown next to Disk you can choose the hard drive you want to work with. I am going to setup both of the disks I have.I am going to leave the rest of the options at default, but I want to mention the last one which is thePreformatted File System. If you have disks that are already formatted you can choose that format here. If they are unformatted just leave the default as you can format them later.
When done with your setting click Add. I am going to repeat this for the other hard drive I have on this virtual machine also.


4. Now select Disks and then Format from the top menu.

5. I am going to create a Mirror 1 Raid pairing with these drives, so I am going to choose the first disk in the Disk dropdown, and then in the File System dropdown I am going to chooseSoftwareRaid.
Click on Format Disk to start the setup. After clicking Format you will get a warning that all data will be lost. If you are good with that click Ok. I am going to repeat this same process for the second drive.


6. From the top menu choose Disks, and then choose SoftwareRaid.

7. The RAID 1 tab should be selected, click on the plus sign in the lower right corner.


8. Put a name for your new RAID 1 drive next to Raid name, choose the Balance algorithm you want to use, and select the disks you want to add to the array. Then place a check in the box that says Create and initialize RAID and click on Add.


9. You will be taken back to the main RAID 1 tab now and have to click on Apply changes.


10. On the top menu choose Disks, and then Format.


11. In the Disk dropdown select the RAID drive we just created and depending on what you are going to use this for you might want to change the File System, but in our case where we are just using this for extra storage leave the default UFS in place.
If you want, give your volume a name and then click on Format disk. After clicking you will get a warning about erasing all data, click Ok to start the format.


12. From the top menu now select Disks, then Mount Point.

13. Click on the Plus sign to mount the RAID disk.

14. For the Disk dropdown choose the RAID drive you created, in the Partition dropdown we will leave the default; enter a name next to Share name. I will leave the rest of the settings as is and click Add.


15. You will be taken back to the Mount Point page where you are asked to Apply changes to confirm mounting of the disk. Click on Apply changes.


16. Now that we have the drive setup and mounted, let’s turn on the CIFS/SMB service so our Windows clients can access the drive. In the top menu click on Services, and then CIFS/SMB.

17. On the Settings tab click the box that says Enable then click Save and Restart at the bottom. I am going to leave all the other settings at their default. You can always come back at a later time and tweak for performance.


18. Click on the Shares tab and then click on the Plus sign.

19. To setup the share you need to enter a Name, Comment, and Path. The path is easily set by hitting the  button and choosing the top level path.
I am going to leave the other settings default, but there are some options there that might be of use so make sure you look through them. When you are done click Add.


20. You are then taken back to the Shares tab to confirm your selection. Click on Apply changes.

You have now successfully setup the drives as a RAID 1 drive and also setup a service/share to allow Windows clients to access the drive. Let’s test it out.


From here I could map a drive or just setup a shortcut to access this drive.

Google


I will use Google before asking dumb question

Someone thinks you are an idiot because you were too stupid to check Google before asking a question. They gave you a link to this site as a joke. The fact that you followed it pretty much proves the point.

Hope that helps.

Have a nice day.

Red Hat Enterprise Linux Server 6.0 Basic Installation on VMware

1) create new cirtual machine..


2) power on the new virtual machine


3) connect iso image on local disk


4) press ctrl+alt+insert utk restart server